Payments
SelfKit provide webhooks to handle Paddle's event.
Paddle, a merchant of record (MoR). They provide payment processing, tax compliance, subscription management, and fraud protection.
Paddle is specificaly suited for Digital Products, you can check which business is allowed here
Why paddle ?
Paddle simplifies selling digital products by acting as MoR, handling taxes (like VAT for EU residents), compliance, invoicing, and chargebacks. Paddle also assumes liability for compliance and audits, whereas payment processor like Stripe places this responsibility on you. This makes Paddle a more streamlined, cost-effective option for businesses looking to reduce administrative and legal burdens.
Prerequisites
- For dev and local development:
- Create an account on Paddle sandbox
- For production:
- Create an account on Paddle
- Proceed Website and Identity verification.
Setup
Create notifications
First we need to enable Paddle notification in order to receive event in your app
- Log in to your Paddle dashboard corresponding to your environment (e.g., production or sandbox).
- On the right panel, go to
Developer Tools > Notifications. - Set up a new webhook to handle subscription-related events:
- Description: Subscriptions
- Notification type: Webhook
- URL:
https://YOUR-DOMAIN/payment/paddle - Usage type: Platform Only
- Events:
subscriptions.createdsubscriptions.updated
- Then add the destination to handle products and pricing:
- Description: Price and products
- Notification type: Webhook
- URL:
https://YOUR-DOMAIN/payment/paddle/products - Usage type: Platform Only
- Events:
product.createdproduct.updatedprice.createdprice.updated
- For each destination, open its settings and locate the Secret Key section. Copy the secret keys and use them to populate the following fields in your
.envfile:PADDLE_SUBSCRIPTION_WEBHOOK_KEYwith Subscriptions webhook secretPADDLE_PRODUCTS_WEBHOOK_KEYwith Price and products webhook secret
NOTEIf you are self-hosting your application with Coolify, there’s no need to populate the
.envfile manually. Simply add the secrets directly in Coolify under the Environment Variables section. For more details, refer to the tutorial .
Get Paddle key and token
In order to make api call and create checkout, we need an Api key and a client-side tokens, you can easily get them by following those steps:
- In your Paddle dashboard, go to
Developer Tools > Authentication. - If no default key exists, click on Generate API Key.
- Next, click on Generate client-side token.
- Populate the following fields in your
.envfile:PADDLE_API_KEYPUBLIC_PADDLE_CLIENT_TOKEN
.envfile.
Configuration for local development
In a local environment, you usually can't receive Paddle notifications directly on your localhost. To solve this, you can use Hookdeck. Here's how to set it up:
Run the following command to install the Hookdeck CLI globally:
npm install hookdeck-cli -gRun the following commands to create listeners for Paddle events:
hookdeck listen 5173 paddle-products --path /payment/paddle/productshookdeck listen 5173 paddle --path /payment/paddle
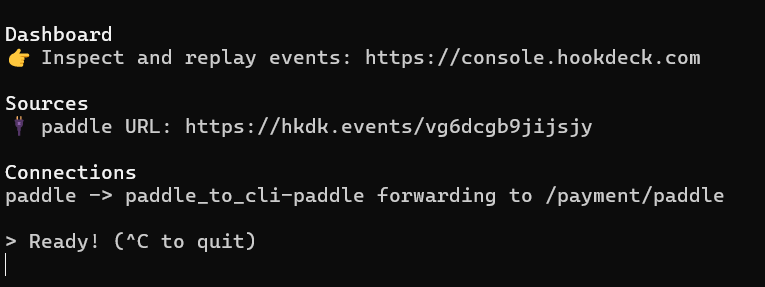
For each command, a terminal window will open displaying a "Source URL" (see image below). Replace the notification URL in the Paddle dashboard with the provided Source URL from the terminal.

Your app is now configured to receive Paddle events in your local environment!
Add products and prices
Now you app can receive Paddle's event, let's add Product and Price:
- In your Paddle dashboard, navigate to
Catalog > Productsusing the right panel. - Click on New Product to create a new product.
- Select the newly created product, then click on New Price and complete the form. NOTE
Pay close attention to the product quantity limit. In most cases, you’ll want to set the maximum quantity to
1to prevent customers from accidentally purchasing the same subscription or one-time product multiple times. - Your app should now have a new product and product variant (i.e. Paddle product price) created in the database.
Paddle webhooks handling
Our API listens to Paddle events to update the database accordingly. Here is an overview of how it handles Products, Prices, and Subscriptions:
Products
Each time a product is created or updated in Paddle, SelfKit will create or update it in the database. However, a product alone does nothing in the application; it must have an associated product variant.
Price
In Paddle, a price is equivalent to a product variant in SelfKit. If a price is sent to the application but the corresponding product is not found in the database, the webhook will automatically add the product.
A product variant can represent either a one-time product or a subscription product. The billing_period attribute determines the distinction.
Subscriptions
When a payment is validated by Paddle, our webhook adds a new subscription to the database. Each subscription references a user and a product variant.
Key Points:
The webhook does not create users; the user must already exist in the database.
The webhook links the subscription to the user by their email address.
A subscription can have one of the following statuses:
activecanceledpast_duepausedtrialing
Typically, a user can access the application only if their subscription status is
active,paused, ortrialing.NOTEFor security reasons, users are required to authenticate before making a payment by default. To disable this protection, remove the redirection logic in the
pricing.sveltecomponent and modify the webhook insrc/routes/payment/paddle/+server.ts.
You can check webhooks code in:
src/routes/payment/paddle/+server.tsfor Subscriptionssrc/routes/payment/paddle/products/+server.tsfor Products and prices
Also all database schemas are located in src/lib/server/database/schemas.